Connect to the WiFi with the Raspberry Pi 3 and others
ⓘ Cet article peut avoir été partiellement ou totalement traduit à l'aide d'outils automatiques. Nous nous excusons des erreurs que cela pourrait engendrer.
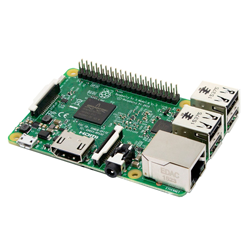
If in the past it was necessary to use a wifi adapter with the Raspberry Pi, the arrival of the Raspberry Pi completely changed the deal.
Indeed, with the Raspberry Pi 3 the wireless is now natively integrated and it is now possible to connect to a wireless network without going through an external dongle.
However, we have received a lot of emails or comments indicating difficulties in using this new wifi chip! So we roll up our sleeves to offer you a tutorial to learn how to connect to wifi with the Raspberry Pi!
Note that if you have a Raspberry Pi that does not have built-in wifi, you can still use a wifi adapter (like this one) and all the explanations provided in the tutorial remain valid.
Update Raspbian to add WiFi support on the Raspberry Pi
On older versions of Raspbian, it is possible that the drivers necessary for the proper functioning of the wifi chip are not installed.
If you are in this situation, you will need to update your Pi, for this you just have to run the following commands:
sudo apt update
sudo apt dist-upgrade
When the operation is complete, simply restart your Raspberry Pi.
Connecting Raspberry to WiFi via GUI
If you use the Raspberry Pi with a GUI, this part is for you.
The network icon is located at the top right of the screen, next to the clock. If you are using a wired connection, disconnect the Ethernet cable before proceeding.
Once the icon is found, click on it, a list of networks (more precisely, their SSID) will appear, you will have to find yours, for example “Livebox 4B5R” (for information, this is a french type of router. In France, the residencial gateways are frequently designed as “box”, so, dont be surprised if you see us using this term).
By default, the access point requests a password or an encryption key, so when you have selected your network, a popup will ask you for this information if necessary!
Once the password has been entered, click the OK button. The Raspberry will then try to establish the connection, the icon will then change to blue! If the connection is successful, the icon will show the power of the network!
That’s it, you just connect your Raspberry Pi 3 to wifi!
How to connect to WiFi network using command line with the Raspberry Pi 3
If the connection to wifi with a graphical interface is very easy, it is usually the connection to the wifi using command line that is problematic.
So let’s learn how to use the good old command line to connect the Raspberry Pi 3 to the wifi!
First, we will edit the wpa_supplicant.conf file.
sudo nano /etc/wpa_supplicant/wpa_supplicant.conf
Go to the end of the file and add the definition of your wifi network by following this template:
network={
    ssid="nameOfTheBox"
    psk="securityKey"
    key_mgmt=WPA-PSK
}
Replace nameOfTheBox by the SSID of your network and securityKey by the password of your wifi network.
If your network use a WEP key rather than WPA/WPA2, insert the value NONE for key_mgmt, you should have something like key_mgmt=NONE.
Finally, if you connect to an open network, not protected by a password, you only need to enter the SSID.
Once you have changed the WiFi configuration, save the file with CTRL + O, then exit with CTRL + X!
Your Raspberry Pi 3 is now configured to connect to the internet via its wifi chip. All you have to do now is start the wifi of the Raspberry Pi with this command:
ifconfig wlan0
The Raspberry Pi cannot connect to WiFi
If you have followed all these steps and done all the configurations, your Raspberry Pi should now be able to connect to wifi.
If, however, your Raspberry Pi steel cannot connect to wifi, there is a good chance that it comes from using a channel not compatible with Raspberry Pi (sometimes channel 12 and 13 can be a problem ), Or a box not compatible with the 802.11b / g / n standards used by Raspberry Pi.
In both cases, you can probably fix the problem by going to the configuration page of your wireless router.
Conclusion
Congratulations, you now know how to connect to wifi with your Raspberry Pi in command line or with GUI!
So, you just have to take advantage of the possibility of connecting your Raspberry Pi to wifi to learn how to mount a super video surveillance system.


