
How to install a web server on the Raspberry Pi (Apache + PHP + MySQL)
ⓘ Cet article peut avoir été partiellement ou totalement traduit à l'aide d'outils automatiques. Nous nous excusons des erreurs que cela pourrait engendrer.
After creating your SD card, and after starting your Raspberry Pi for the first time, there are strong chances that you want to use as a web server.
Why a Raspberry Pi as a web server ?
But why use a Raspberry as a web server, rather than using services providers specialized in web hosting?
First, from an economic point of view, you should know that web hosting services are not free and that you have to pay every month / year. Unlike the Raspberry who just need to a connection.
In addition, by choosing Raspberry, you have the possibility to modify your services like you want (examples: the size of the disk, the hosting of Database, etc.), which is generally not the case with specialized hosts , Which often sell shared hosting with low configuration capacity.
However, to support more users, you should use a Raspberry Pi 3 (the Pi 3 can be found here), the Raspberry Pi with 1 GB of RAM, rather than the Raspberry type B + (512 MB of RAM)
The question that now arises is, how to make a web server on Raspeberry Pi ?Installation du serveur Apache avec Raspbian
What is Apache ?
First, we will install Apache, which is the web server as such.
When we speak of a web server, we often think about the machine, but this term also refers to the software that allows the machine to analyze user requests (in http form), and to return the file corresponding to the request (Or an error if the file isn’t found, or the query incorrectly formulated).
As part of Apache, it’s software that we talk about.
At the moment, Apache is the most used web server, with about 60% market share. Apache has its own license, used by many other projects. In addition, the massive use of Apache (which has become the standard for web servers), coupled with its high popularity, has led to a tremendous abundance of documentation, courses, and other books dealing with its use, and his security, like this book.
Whether it is for the Raspberry Pi and Raspbian, or for a more general-purpose machine, Apache is therefore a safe choice, and the skills you will be able to acquire on the subject will always be useful.
Apache installation
Before installing the server, make sure we have an up-to-date machine. To do this we must have administrator rights, either because of the sudo command.
sudo apt update
sudo apt upgrade
sudo apt update
Once the Raspberry Pi is up to date, we will install the Apache server.
sudo apt install apache2
By the way, we’ll take advantage of it to give rights to the apache file that you can easily manage your sites. To do this, run the following commands:
sudo chown -R pi:www-data /var/www/html/
sudo chmod -R 770 /var/www/html/
Check if Apache is working
Once the installation completed, we can test that Apache is working properly by going to the Raspberry address.
To do this, it’s necessary to try to access to the Raspberry from port 80 (this port not being opened from the outside, it will have to do since the Raspberry itself). Do not worry, it’s very easy. Simply open the Raspberry web browser, and go to “http://127.0.0.1”. You should then get a page with a message like “It works! “And plenty of other text.
If you do not already have a GUI on your Raspbian, or you use SSH to connect to your Raspberry, you can use the following command:
wget -O check_apache.html http://127.0.0.1
This command will save the HTML code of the page in the file “check_apache.html” in the current directory.
So you only have to read the file with the command
cat ./check_apache.html
If you see marked at a location in the code “It works! ” is that Apache is working.
Apache uses the directory “/var/www/html” as the root for your site. This means that when you call your Raspberry on port 80 (http), Apache looks for the file in “/var/www/html”.
For example, if you call the address “http://127.0.0.1/example”, Apache will look for the “example” file in the “/var/www/html” directory.
To add new files, sites, etc., you will need to add them to this directory.
You can now use your Raspberry to make a site in HTML, CSS and JavaScript, internally.
However, you may want to quickly allow interactions between the site and the user. For example, to allow the user to register, etc. For this, you are going to need PHP.
PHP installation on your Raspberry Pi
What is PHP ?
First of all, you should know that PHP is an interpreted language. And as in the case of servers, the acronym PHP can have several meanings. In fact, when we talk about PHP, we can talk about either the language or the interpreter.
Here, when we talk about installing PHP, it means that we will install the interpreter, in order to use the language.
PHP (the language this time) is mainly used to make a site dynamic, that is to say that the user sends information to the server which returns the modified results according to this information. Conversely, a static site doesn’t adapt to information provided by a user. It’s saved as a file once for all, and will always deliver the same content.
PHP is free, and maintained by the PHP Foundation, as well as Zend Enterprise, and various other companies (it should be noted that Zend is also the author of the famous Zend PHP framework, widely used and recognized in the world of ” business).
It’s one of the most widely used programming languages, and it is even the most used for web programming, with about 79% market share.
Again, all the skills you can acquire, on the language, or on the installation and configuration of the interpreter, will always be useful. So we can only advise you to learn the PHP, which is really a wonderful language and too often underestimated.
How to install PHP
We will again use the administrator to install PHP with the command line.
sudo apt install php php-mbstring
Control if PHP is working
To know if PHP is working properly, it’s not very complicated, and the method is quite similar to the one used for Apache.
You will first delete the file “index.html” in the directory “/var/www/html”.
sudo rm /var/www/html/index.html
Then create an “index.php” file in this directory, with this command line
echo "<?php phpinfo ();?>" > /var/www/html/index.php
From there, the operation is the same as for the Apache check. You try to access your page, and you should have a result close to this image (if you do not have an interface, use the same method as before, and look for the words “PHP Version”).
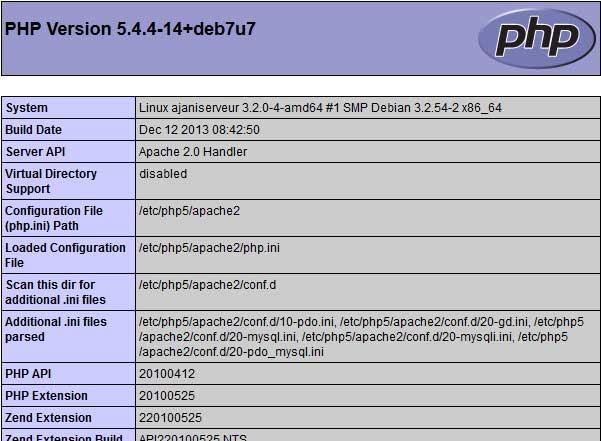
Table generated by the phpinfo command on a Raspberry.
A MySQL database for your server
A DBMS what’s it ? Why MySQL ?
Now that we have set up PHP, you will probably want to store information for use in your sites. For this purpose, databases are most often used.
We will therefore set up a DBMS (Database Management System), namely MySQL.
MySQL is a free, powerful, massively used DBMS (about 56% market share of free DBMS). Here again, MySQL is so essential to development, whatever the language, that you must absolutely learn and master it, with this book for example.
How to install MySQL
To do this, we will install mariadb-server and php-mysql (which will serve as a link between php and mysql)
sudo apt install mariadb-server php-mysql
Verify that MySQL is working correctly
To check the operation of MySQL, this time we will only use the command line. To do this, we will simply connect via the command:
sudo mysql --user=root
We will no delete the default mysql root user and create a new mysql root user, because the default one can only be used with Linux root account, and so not available for the webserver and php scripts.
To do so, once your connect to MySQL, simply run thoses commands (replace password with the password you want) :
DROP USER 'root'@'localhost';
CREATE USER 'root'@'localhost' IDENTIFIED BY 'password';
GRANT ALL PRIVILEGES ON *.* TO 'root'@'localhost' WITH GRANT OPTION;
So you now have a web server, connected to PHP and MySQL. That’s all it takes.
(On your nexts connections, you will be able to connect to mysql without using sudo, with the command mysql --user=root --password=yourmysqlpassword).
Add PHPMyAdmin
The installation of PHPMyAdmin is absolutly not necessary. In this installation, we will not take care about any special security settings !
The PHPMyAdmin installation is pretty quick and easy, we simply have to use the packet manager with this command :
sudo apt install phpmyadmin
PHPMyAdmin installation program will ask you few question. About the dbconfig-common part, choose to not use it (as we have already configure our database). About the server to configure PHPMyAdmin for, choose Apache. And the root password is the one you set for MySQL.
You should also enable mysqli extension using the above command :
sudo phpenmod mysqli
sudo /etc/init.d/apache2 restart
Check that PHPMyAdmin is working properly
To check that PHPMyAdmin works, you will simply try to access it, using the address of your Raspberry followed by /phpmyadmin. For example, locally it will be http://127.0.0.1/phpmyadmin
If you still get an error, it could be because PHPMyAdmin has moved to another directory. In this case, try the command
sudo ln -s /usr/share/phpmyadmin /var/www/html/phpmyadmin
Now, we can access to PHPMyAdmin from Raspberry Pi’s browser, with the url : http://127.0.0.1/phpmyadmin
Making a server accessible from the web
Your web server is ready. However, you probably can not access it from the internet. Indeed, it would be necessary for that your modem to redirects the requests to your Raspberry, the good ports.
To put these redirections in place, and even get a URL, you should look to DynDNS and port forwarding !


Great tutorial. Thank you. Up and running. Easy as pie.
Thank you! Everything working well.
Everything worked great until trying the command:
sudo phpenmod mysqli
I get the error:
WARNING: Module mysqli ini file doesn’t exist under /etc/php/7.3/mods-available
Another response said to install mysqli, but I have no idea how to do this. I’ve checked other pages and none of their solutions worked.
Hello,
sudo apt install php-mysql.Worked Great! I signed up for the newsletter to stay informed too. Quick question: regarding making the server accessible from the web (DynDNS and port forwarding), are you planning to create a tutorial or is there one available you can recommend?
Hello, there is one tutorial in french, but it’s a really difficult tutorial to translate for multiple reasons, mainly :
1 – The internet offer is very different in europe, USA, etc.
2 – The interface of each router is different and we cannot make ultra easy tutorials about all or any of them.
3 – DynDNS providers itself are quick to change or becoming paying.
But to keep it simple the main idea is always the same. Give your raspberry pi a fixed IP. Configure your modem to redirect at least port 22 and 80 at the raspberry pi’s IP. Add credentials for your DynDNS account to your modem.
Hi Steve!
You probably copied the section where the password is changed to “password”, if you don’t change it.
Log in with “mysql –user=root –password=password” and execute the following commands again, this time, change the “password” to your own passphrase:
DROP USER ‘root’@’localhost’;
CREATE USER ‘root’@’localhost’ IDENTIFIED BY ‘password’;
GRANT ALL PRIVILEGES ON *.* TO ‘root’@’localhost’ WITH GRANT OPTION;
Also, if myphpadmin is not working afterwards, it might be because of missing config file reference in apache2.conf:
https://askubuntu.com/questions/55280/phpmyadmin-is-not-working-after-i-installed-it#55282
Hi, I just installed the OS from Noobs and immediately followed your instructions but when I try to log in as mysql –user=root –password=mypassword
I get
ERROR 1045 (28000): Access denied for user ‘root’@’localhost’ (using password: YES)
Same happens when I try to log into phpmyadmin
Before installing phpmyadmin I tested access to mysql with
mysql –user=root –password=mypassword and I could log in..so it seems something happened when I installed phpmyadmin. One clue might be that phpmyadmin setup did not ask for a password. I did answer no to the dbconfig-common part but your instruction indicate that I should also enter a password same as used for mysql
Any ideas?
Maybe try to connect to mysql with sudo. You have to update default root user to be able to connect root without sudo.
After entering “sudo phpenmod mysqli” i get an error:
WARNING: Module mysqli ini file doesn’t exist under /etc/php/7.0/mods-available
WARNING: Module mysqli ini file doesn’t exist under /etc/php/7.0/mods-available
What do I do?
You must install php-mysqli first.
great tutorial, thank you very much for sharing 🙂
Instead of installing mysql-server
sudo apt install mysql-server php-mysql
you can install mariadb-server
sudo apt install mariadb-server php-mysql
Once your connect to MySQL (or mariadb) to replace password with the password you want, I recommend to include “WITH GRANT OPTION”. You will thank me later…
> DROP USER ‘root’@’localhost’;
> CREATE USER ‘root’@’localhost’ IDENTIFIED BY ‘your_password’;
> GRANT ALL PRIVILEGES ON *.* TO ‘root’@’localhost’ WITH GRANT OPTION;
before exiting, you can verify your changes
> FLUSH PRIVILEGES;
> SHOW GRANTS FOR ‘root’@’localhost’;
> \q
I used this tutorial and it was very nice to get my Raspberry pi to work!
So thanks for sharing this doc.
But when I really started to use phpmyadmin I noticed I can not edit privileges for any (new) database users in phpmyadmin.
> You can create a new user, but never change or give full permissions.
This is while the user ‘root’ does not have enough privileges.
For this to work, user ‘root’ should also have ‘GRANT ‘ privileges.
So instead of:
DROP USER ‘root’@’localhost’;
CREATE USER ‘root’@’localhost’ IDENTIFIED BY ‘password’;
GRANT ALL PRIVILEGES ON *.* TO ‘root’@’localhost’;
I recreated the root user again and used — >WITH GRANT OPTION
DROP USER ‘root’@’localhost’;
CREATE USER ‘root’@’localhost’ IDENTIFIED BY ‘password’;
GRANT ALL PRIVILEGES ON *.* TO ‘root’@’localhost’ WITH GRANT OPTION;
Now the phpmyadmin tool works perfectly!
Can someone acknowledge this is the way to do it?
Thanks, we have fixed the tutorial.
After entering the following command ‘sudo phpenmode mysqli’ I get the following error ‘sudo: phpenmode: command not found’. How do I fix this; please? all else seems to work find including access via web.
Hello, sorry my mistake i have involontary add an “e”.
I got a “The mysqli extension is missing” Error when accessing the phpmyadmin page.
Hello, you may have to do something like
sudo apt install php-mysqland restart php & apache.Where can I find one for Windows?
Hello, there is no Windows on Raspberry Pi. Also, i strongly advise you to use Linux instead of Windows for any server purpose.
I have followed all of these instructions exactly, however, the phpmyadmin is not working. (I did have to copy it from /usr/share/phpmdmin as described to alleviate the 404). What I am experiencing is a message telling me the mysqli extension is missing. Any ideas on how to fix this?
Yes, probably something like
apt install php-mysqlthen restart.Man, you saved me literally. I am using this lamp stack on pi in my final year project, I was stuck for more than a week. I am very grateful to you. This is the only working tutorial on the internet probablt, because if the line that asks to recreate the root user in mysql. I don’t know when mysql changed this shitty setting but thanks a lot. Nice work keep it up.
Everything went well until this instruction:
mysql –user=root
To which I received the message:
ERROR 1698 (28000): Access denied for user ‘root’@’localhost’
After some headbanging (I’m a complete noob), I realized that the command should be:
sudo mysql –user=root
Otherwise, a great tutorial for the first timer!
Oops, we fixed it on french version but visibly forget the english one… Sorry…
Hi, I do follow (at least I was trying to..) your very nice howto. Thanks for this.
I am not able to run the Task under section “Verify that MySQL is working correctly => mysql –user=root”. The command always ending up with message “Error 1698 (28000): Access denies for user ‘root’@’localhost’
Just one information: command “sudo apt install php php-mbstring” will install PHP Version 7.0.27-0+deb9u1
Any help is very welcome as I am completly beginner on Raspberry PI.
Thanks, Markus
Hey, you need to add “sudo” before mysql connection, we fixed it, thanks !
Small typo in “Control if PHP is working”
Working php code is:
Space before Php results in blank page.
Thanks, we fixed it !
Hello!
I had to change two lines to be able to proceed with the installation.
In PHP: sudo apt install php5
In MySQL: sudo apt install mysql-server php5-mysql
Done this everything was installed perfectly, I think I could have the installation of PHPMyadmin.
Thank you.
Hey, we update tutorial for PHP7, should be all ok now. Thank’s for the info.