Create your own seedbox to download torrent remotely with Transmission
ⓘ Cet article peut avoir été partiellement ou totalement traduit à l'aide d'outils automatiques. Nous nous excusons des erreurs que cela pourrait engendrer.
You dream of having a seedbox but the market offers its too expensive? The Raspberry Pi is a perfect tool to host its own seedbox by the fact that it can run 24/7 without disturbing and with a low cost of electricity. But before you explain how to create your own seedbox from A to Z very easily, we will lay the foundation by introducing you what a seedbox and the hardware you will need.
What is a seedbox?
First of all, let’s explain exactly what a seedbox is. “Seedbox” designates a server dedicated to receiving and sending files using peer-to-peer protocol and thus using torrent.
Prerequisites for installing Transmission
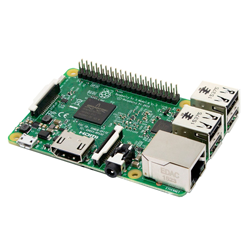
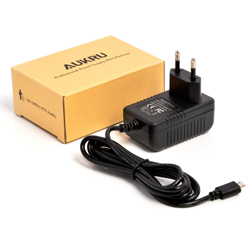
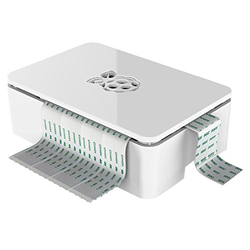
To create your seedbox, you will not need a lot of hardware. You will obviously need a Raspberry Pi with all that is vital to it. Namely its power supply and its sd card with raspbian installed on it. It must also be connected to the internet, or via wifi, you will need a dongle if your model of Raspberry Pi is lower than the third generation, or ethernet . For storage we recommend the use of an external hard drive .
Transmission installation and configuration
Let’s move on to the (very simple) Transmission installation on the Raspberry Pi.
First connect to it via SSH. If SSH is not enabled, I invite you to read our article dedicated to SSH .
When you are connected, run the following command:
Sudo apt install transmission-daemon
Transmission is installed as soon as the command is executed. All you have to do is configure it. To do this simply interrupt the transmission process and edit the configuration file :
Sudo /etc/init.d/transmission-daemon stop
To interrupt the process and
Sudo nano /etc/transmission-daemon/settings.json
To edit the configuration file.
I will only introduce the main configuration lines because there are many, but know that if you want to configure more in depth your transmission you will find your happiness on the github page dedicated to the configuration of transmission .
One of the first lines to watch is
"Download-dir": "/var/lib/transmission-daemon/downloads"
This line indicates the location of the files that will be downloaded. This is where you can put the location of the external hard drive if you choose this storage option. Be careful if you change the location to make sure that Transmission has sufficient rights to write to the new folder.
Then you will find the option
rpc-authentication-required
This option, true by default, indicates that when you arrive on the web interface of Transmission you will have to identify yourself to be able to access it. You have to pass it to false if you do not want to have authentication.
Who says authentication, says pseudo and password. You will find them on the lines
"rpc-username": "transmission",
"rpc-password": "{356c072a1bc5d97132bbe6ccd26854798b801dcf8kL7gaRF",
As you can see the password is encrypted. By default it is “transmission”. If you want to change it, replace the entire character string between the quotation marks by your new one without encrypting it in advance. Transmission will do this the next time the service is restarted.
This is for the main transmission configurations. You can now start the service with the command
Sudo /etc/init.d/transmission-daemon start
Go to Transmission
To access the transmission interface, simply open a web browser and enter the address in the following format:
http://IPraspberry:rcp-port/RCP-url/web/
Depending on what you entered in the configuration the url can change but with our Raspberry Pi which has an ip address in 192.168.1.21 and with the default configurations, this gives the following url
http://192.168.1.21:9091/transmission/web/
Once authenticated you will only have to upload a torrent file or a url of a torrent to start a download. To do this, simply click on the blue folder in the upper left corner of the web page.
Recovering a download
Well it is nice to download on his Raspberry Pi a file but the goal still remains to repatriate on his computer to be able to fully enjoy. The problem is that the web interface of transmission does not allow it. So if for that you have to turn off his Raspberry Pi and read his SD card (or external storage) on his PC is not very convenient. We will then retrieve the file (or folder) downloaded via the SSH protocol. For this you will need the filezilla software

To log in, you just need to fill in the ip of the Raspberry Pi, the login / password and port 22.
Once connected, you will have the architecture of your Raspberry ft in the right window and will be able to repatriate the files and folder of your choice on your computer.
For further
Here you end up with a seedbox that works very well and that can download all your favorite linux ISOs;). However you can improve it, for example by making it accessible from anywhere or convert your seedbox to a vpn to anonymize your download. Briefly full of options come up to improve your seedbox.


