Connect to the Raspberry Pi without internet with the serial port.
ⓘ Cet article peut avoir été partiellement ou totalement traduit à l'aide d'outils automatiques. Nous nous excusons des erreurs que cela pourrait engendrer.
How to control the Raspberry Pi when it is not possible to plug it into a keyboard, nor to connect it to the internet.
We will see how to use the serial connection of the Raspberry Pi in order to control it from a PC.
The necessary equipment
To be able to connect in series to the Raspberry Pi and control it we need the following equipment:
You will also need a computer to connect the Pi to via the USB to Serial port cable.
How to connect the USB cable to the serial port of the Raspberry Pi?
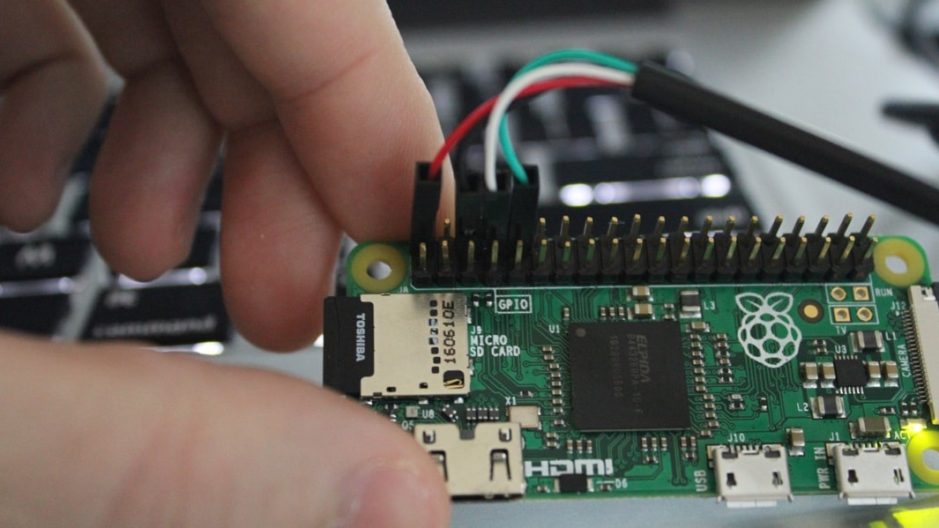
The first thing we need to do to be able to connect to the serial port is to hook it up to our computer.
To do this, turn off the Pi and connect the USB port to your computer by connecting the wires to the Raspberry Pi as follows:
- Black wire -> Pin 6
- White wire -> Pin 8
- Green wire -> Pin 10
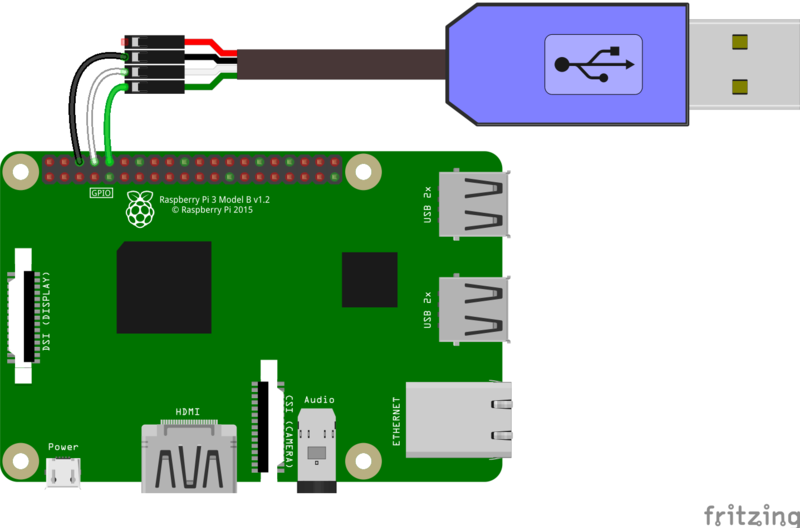
We intentionally leave the red wire disconnected. Indeed, it is normally used to supply current to the Raspberry Pi, so as not to have to use its power supply. Nevertheless, the current supplied seems to me a little weak for the Pi, so it is better to do without.
If you want to try to power the Pi directly from USB, connect the red wire to pin 2. Be careful, however, you must then disconnect the power supply of the Raspberry Pi or you risk to grill it!
How to connect to the Raspberry Pi via the TTL port?
Now that we have connected the serial port of the Raspberry Pi to our PC, how do we connect to the Pi?
First, you need to activate the console port on the Raspberry Pi. To do this, put your SD card in your PC, open the file config.txt in the score boot from the SD card and add the following line to a new line:
enable_uart=1
For this, you have three solutions, depending on whether you are on Linux, Mac OS, or Windows.
Connect to the serial port of the Raspberry Pi with Linux
In Linux, connecting via the serial port is very simple. Normally once the port is plugged in, it is referred to as / dev / ttyUSB0. You just have to open a terminal on it with the command screen :
sudo screen /dev/ttyUSB0 115200
You now have a terminal open on your Raspberry Pi from your PC.
Connect to the serial port of the Raspberry with Mac OS
On Mac, things are a bit more complicated.
You will first need to download the drivers for the cable. Depending on the cable model, two different drivers are required, that of Prolific, or that of SiLabs. To keep it simple, install both.
Once the drivers are installed, you will have to find the name of the device. To do this, open a terminal and run the command below:
ls /dev/cu.*
Looking for a name that looks like /dev/cu.usbserial-NNNN gold /dev/cu.SLAB_USBtoUART gold /dev/cu.usbmodem. Once you've found yours, you can connect with screen, much like in Linux. For example, if you found /dev/cu.usbserial-1234 :
screen /dev/cu.usbserial-1234 115200
Connect to the Raspberry Pi in TTL from Windows
Last possibility, you are using Windows. Things are still a bit more complicated than on the Mac, but it's still pretty straightforward.
As for Mac, start by installing the drivers, found here and there.
You will also need to download the Putty SSH client, available here.
Now we need to find the port used by Windows for the USB connection. To do this, go to the device manager, in the "Ports" section, and look for a device related to "USB to Serial". You should see the port number in parentheses, in the form COM x where the x is a number.
All you have to do is launch Putty, choose a connection in Serial, with a speed of 115200, and to inform the port COM use.
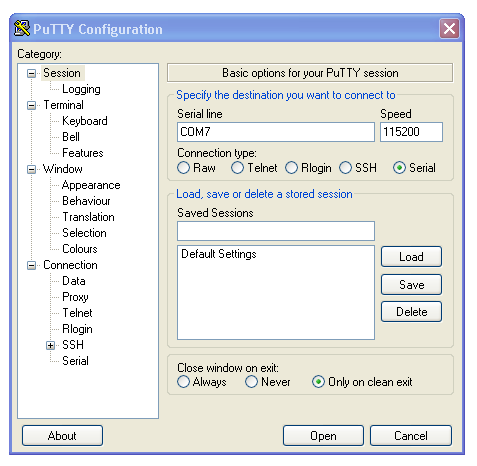
And there you have it, again you have a terminal to your Raspberry Pi, without internet!


