Create an SD card from Windows, Mac or Linux with Raspberry Pi Imager.
ⓘ Cet article peut avoir été partiellement ou totalement traduit à l'aide d'outils automatiques. Nous nous excusons des erreurs que cela pourrait engendrer.
On March 5, the Raspberry Pi foundation announced the release of a homemade tool to facilitate the creation of SD cards, Raspberry Pi Imager, and this from any OS.
We will therefore see how to install Raspbian (or other) on your SD card with Raspberry Pi Imager.
The necessary equipment.
To be able to create an SD card for your Raspberry Pi you will need 3 things:
- A computer running Windows, MacOS or Linux (Debian type distribution and derivatives).
- A microSD card.
- A MicroSD card reader.
It's easy to install Raspberry Pi Imager!
Raspberry Pi Imager is installed like any software on your operating system. You just need to download the version suitable for your system, Windows, MacOS or Linux, double click on the downloaded file and follow the guide.
Note that for Linux you will need a Debian based system, eg Ubuntu.
We are therefore on a classic installation, within the reach of the most beginners!
Flashing the SD card with Raspberry Pi Imager, a snap!
Now that the software is installed, we will be able to flash our SD card to install the system of our choice. Once again, you will see that it is now a breeze.
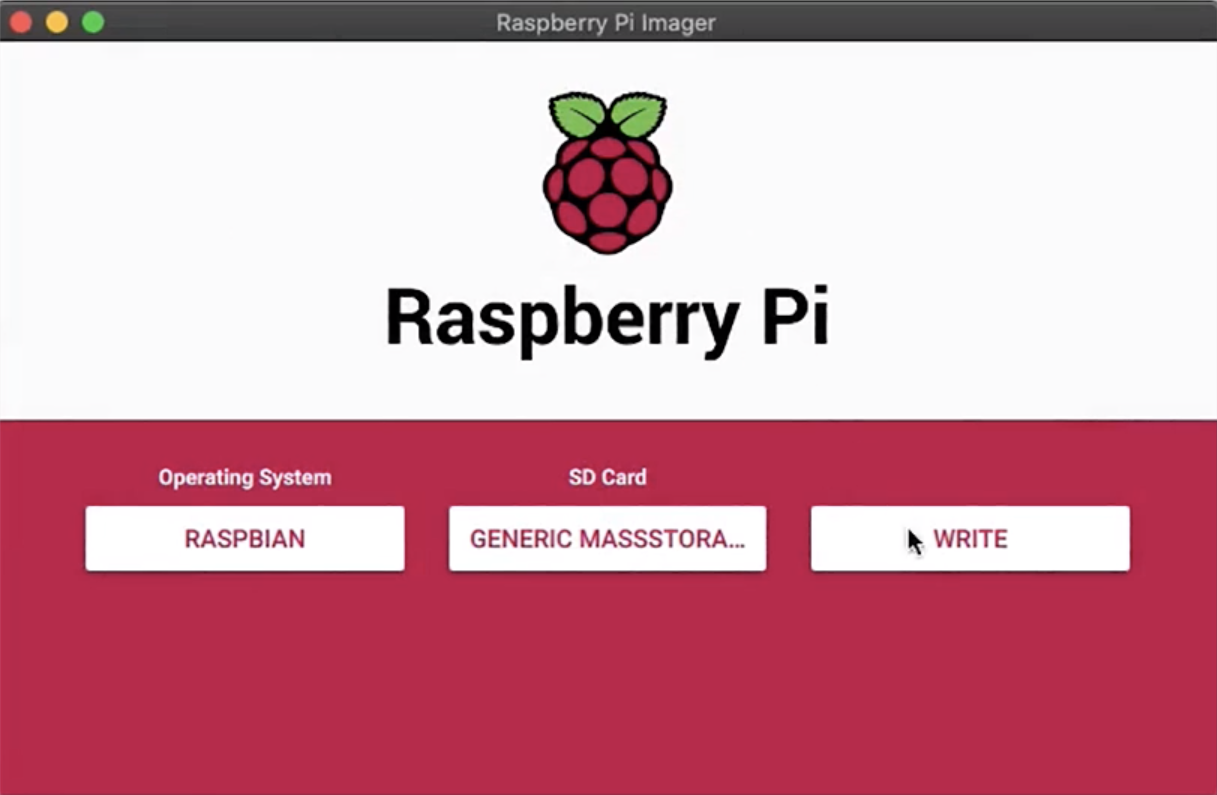
Start by inserting the SD card into your computer, and launch Raspberry Pi Imager, you arrive on the window below.
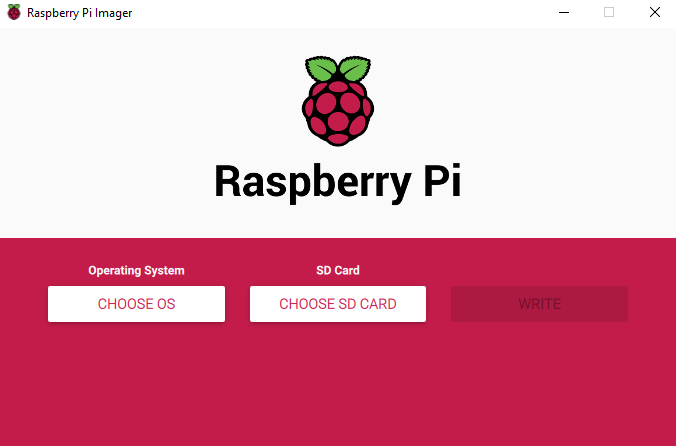
As you can see, the installation will take place in three stages: Choice of system, choice of card, start of writing.
Choose the OS to install.
Good news, you no longer have to download the image of the system you want to install in advance, Raspberry Pi Imager does it for you!
So click on the first button, and a drop-down list of installable systems will appear, just click on the one that interests you.
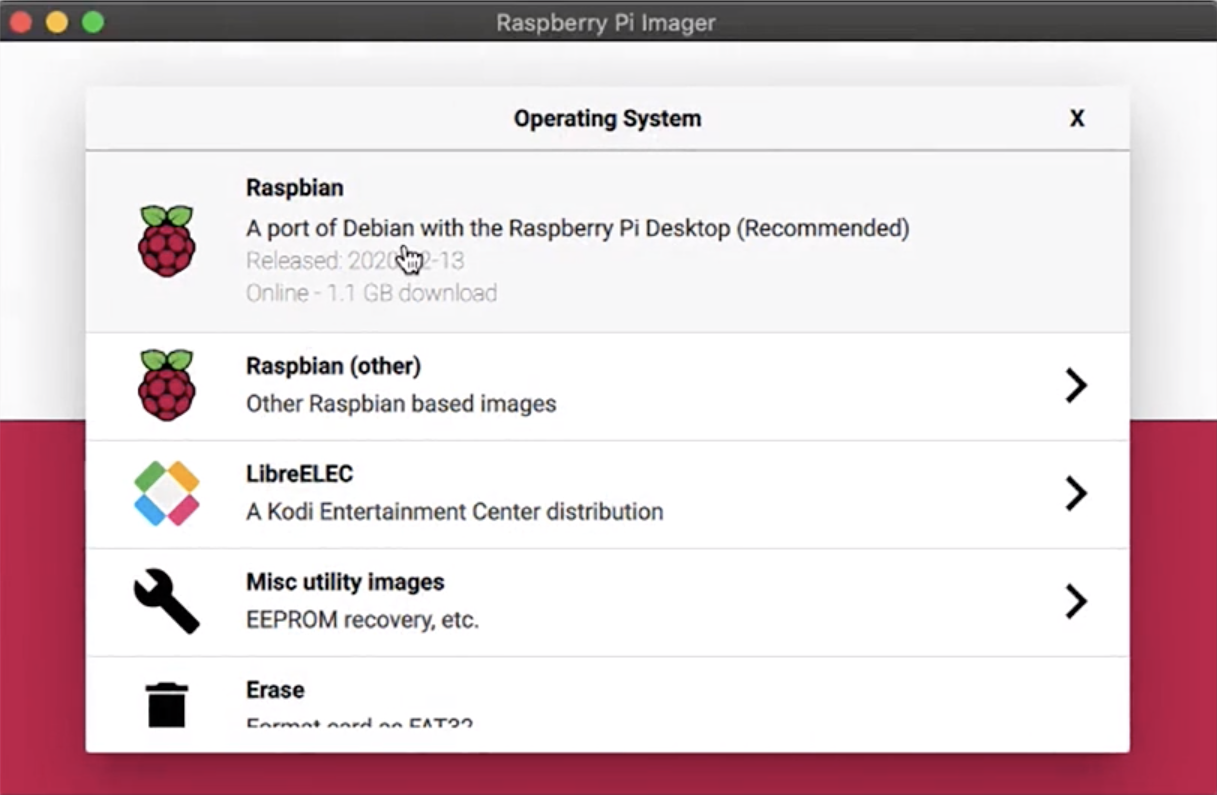
You will notice that a few more options are available, like "Misc utility images", for card or EEPROM memory repairs, "Erase", to format a card in FAT32, or "Use custom" to use an image from your PC rather than letting the software download it.
Choose the SD card.
After choosing the system to install, we need to choose where to install it. To do this, click on the second button and a list of USB keys / SD cards connected to your PC will appear.
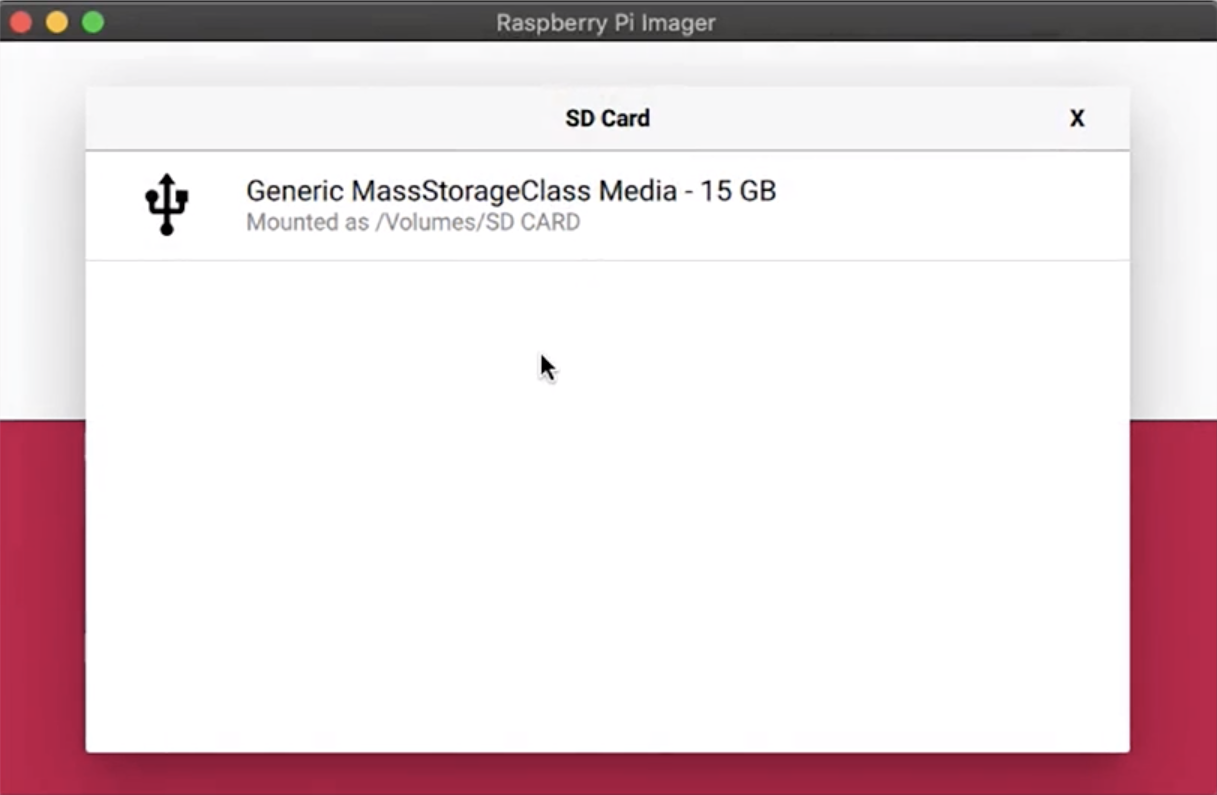
Click on your SD card in the list, and you will come to the last step.
Start writing on the card.
We have chosen which system to install, where to install it, all we have to do is start writing. The button "Write" on the right is no longer grayed out, you just have to click on it and wait for the end!
A progress bar indicates the progress of the writing, all you have to do is wait for the end, remove the card and insert it into your Raspberry Pi!

Obviously, don't forget to enable SSH if necessary!


