Control a 3D printer remotely with the Raspberry Pi and Octopi.
ⓘ Cet article peut avoir été partiellement ou totalement traduit à l'aide d'outils automatiques. Nous nous excusons des erreurs que cela pourrait engendrer.
Like the Raspberry Pi, 3D printing is one of the almost essential tools for makers, hackers and other hackers.
Create almost any plastic object in a few hours, at a ridiculous cost, and with the only constraint of owning a 3D model. For anyone doing prototyping, this is a bit of a dream.
So it was only a matter of time before we did a tutorial bringing together the two themes, 3D printing and Raspberry Pi.
Today, we are going to see how to control a 3D printer remotely with a Raspberry Pi and the Octopi distribution, resulting from the mixture of Raspbian and the Octoprint software.
The objective will be to be able to remotely control a 3D printer, remotely trigger the printing of a file, and observe the printing process live via a webcam.
What equipment to control a 3D printer with Octopi?
To follow this tutorial, you will need the following material (click on the link to see the price online):
- A Raspberry Pi B3 +, previous models can work, but I advise against the variants of the Pi Zero which are not powerful enough, especially for the video stream.
- A 5 volt 3 amp power supply
- A 16 GB MicroSD card
- A RaspiCam camera to be able to film the progress of printing
In addition to all this, you will obviously need a 3D printer.
I suspect that some of you don't have a printer yet, are considering a purchase and are wondering which printer to choose. I absolutely do not claim to be an expert on the subject, I can only give you my feelings and my personal experiences.
Through my studies, my professional and personal experiences, I had the opportunity to use some 3D printers and to see a lot of parts produced by 3D printing.
Personally, I now have an Alfawise U20 printer with which I am fully satisfied. The tutorial was therefore carried out with this printer and the various examples will be made for this printer.
If you are looking for a first machine to buy, I think the Alfawise U20 is a very good machine to start with with an excellent quality / price / capacity and print volume ratio. The prints produced are among the most beautiful that I have seen.
Perhaps the only thing I have to complain about with this printer is the lack of an automated calibration system.

Apart from the Alfawise, I can also recommend the Creality CR-10 which is relatively close but has a larger community.
To start today with 3D printing, these two models seem to me the most suitable.
See the Alfawise U20 See the Creality CR-10
Install Octopi on the SD card
Octoprint is a software for controlling 3D printers via a web interface.
If the software as such is installable on all types of machines, the Octopi distribution offers a pre-installed and pre-configured version for the Raspberry Pi via the Raspbian system.
In this tutorial, it is therefore this distribution that we will use. To do this, start by downloading it from the following address: https://octopi.octoprint.org/latest
Also download the Etcher software, which will allow us to install Octopi on the MicroSD card.
Once Etcher and Octopi have been downloaded, insert the MicroSD card into your computer and launch Etcher. Click on "Select Image" and select the Octopi image. Then click on "Select Drive" and choose the MicroSD card. Finally, click on "Flash!".
Configure the Raspberry Pi's Wi-Fi
Now that the image is installed on the SD card, we are going to configure Octopi so that it connects to your Wi-Fi. If you want to connect directly to Ethernet you can skip this step.
Open your file explorer and go to the boot partition of the SD card.
Use a text editor (like notepad or notepad ++ on Windows, Gedit on Linux, etc.) to open the file octopi-wpa-supplicant.conf in the boot partition.
Empty the file entirely and paste the text below instead.
## WPA/WPA2 secured
network={
  ssid="nom_box"
  psk="mdp_box"
}

country=FR

ctrl_interface=DIR=/var/run/wpa_supplicant GROUP=netdev
update_config=1
Replace the parts nom_box and mdp_box by the name and the password of your box.
This setting is valid for boxes using WPA security (90% of recent boxes). If your box uses WEP security instead, use the configuration below instead.
## WEP "secured"
network={
  ssid="nom_box"
  key_mgmt=NONE
  wep_key0="mdp_box"
  wep_tx_keyidx=0
}

country=FR

ctrl_interface=DIR=/var/run/wpa_supplicant GROUP=netdev
update_config=1
Once the file is filled, save it and eject the SD card.
First start of Octopi on the Raspberry Pi
Now that we have configured the Wi-Fi we will be able to complete the installation on the Raspberry Pi.
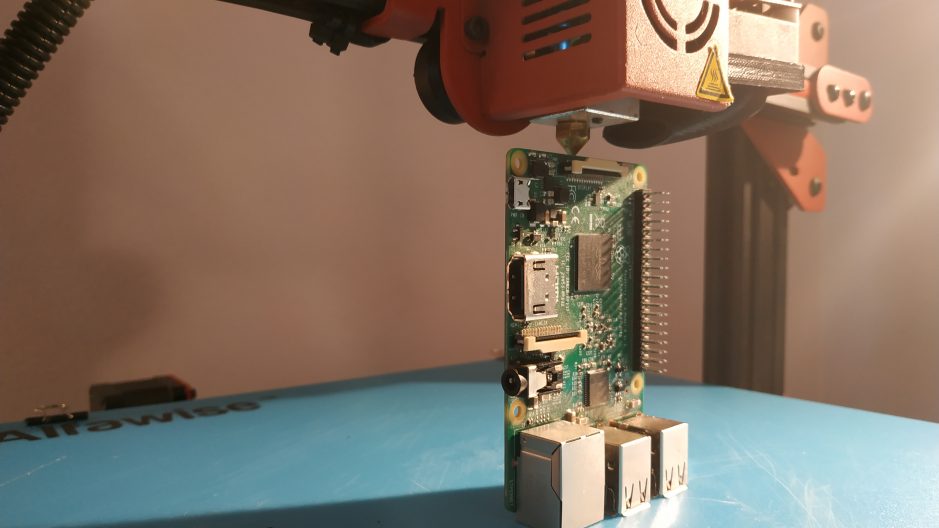
To do this, insert the SD card into your Raspberry and plug in the camera, then plug in the Raspberry power supply.
Wait a few minutes until the Raspberry Pi has completely finished starting up and is properly connected to the network.
First, we'll change the Raspberry Pi's default password via SSH.
To do this, connect in SSH to the host octopi.local with the user pi and the password raspberry. If you don't know how to use SSH, you can read our tutorial on the subject.
Once connected in SSH, run the command sudo raspi-config, choose "Change user password", and enter the new password to use.
Once the password has been changed, we will be able to finalize the installation of Octopi.
Configure Octoprint
To configure Octoprint, first connect your 3D printer to your Raspberry Pi via USB, then connect to the address http: //octopi.local from a computer connected to the same Wi-Fi network as the Raspberry.
You will find yourself on the Octoprint home page and in front of the "Setup Wizard".
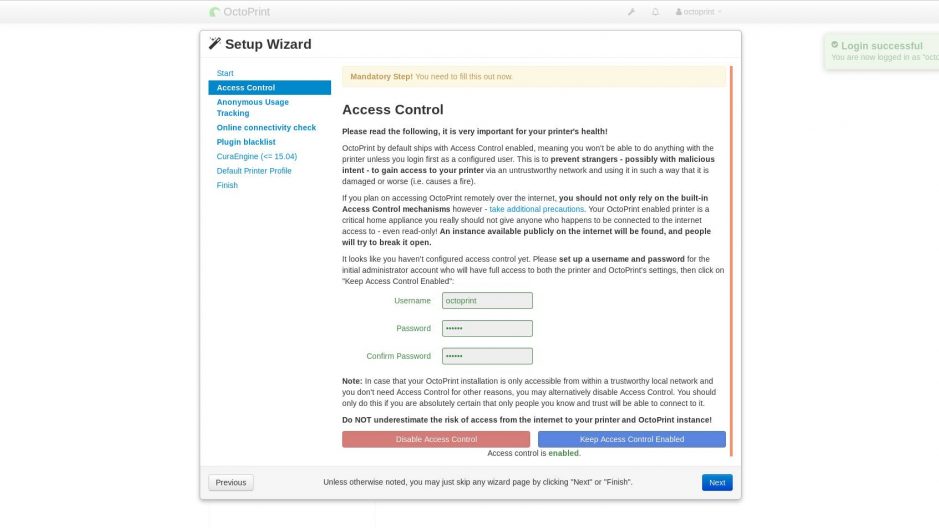
The first step is to set the Octoprint password to prevent anyone from having anything printed on your 3D printer.
Enter the username and password you want to use, then click on "Keep Access Control Enabled", then follow "Next".
The next step allows you to choose whether you want Octoprint authors to be able to collect statistical data. Choose as you see fit and click "Next".
You will now be able to configure the Octoprint connection verification system. Leave it as is and click on "Next"
The next step is to set up the plugin blacklist system, which is supposed to protect you from installing unsafe plugins. Activate or deactivate the system according to your choice then click on "Next".
The next part allows you to configure a custom profile for Cura, skip this step.
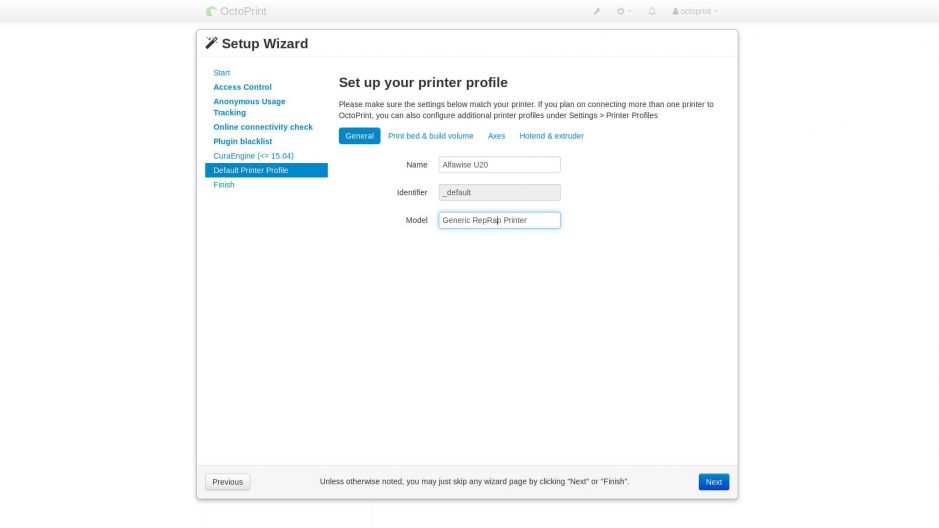
Then, we will be able to configure a custom profile for our printer. This allows us in particular to define the name of the printer, but especially the usable print volume.
Enter the name of the printer in the "General" section.
Then the print volume in the "Print bed & build volume" part. Adapt this information according to your printer model. If you are using an Alfawise U20, you can use the settings below.
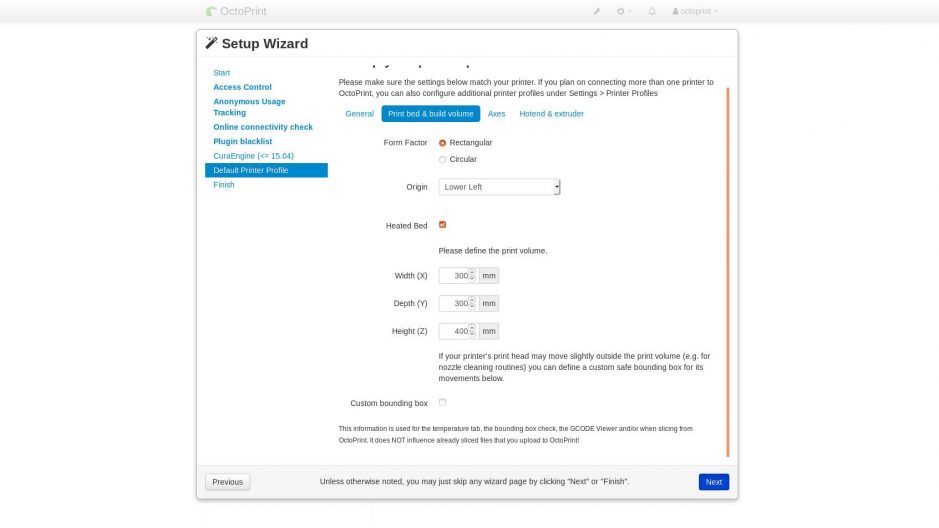
Leave the "Axes" part as it is and configure the "Hotend & extruder" part to adapt the configuration to the size of your printing nozzle (0.4 mm for the Alfawise U20). Once done, click on "Next".
All you have to do is click on "Finish" and that's it, your printer is configured.
To get started, I let you discover the software for yourself, it is really very simple and you will find many tutorials online!
Make Octoprint accessible from the internet
For now, Octoprint can only be used from your local network. If you want to be able to control it from the internet you have to make your Raspberry Pi accessible from the outside. For this, the simplest solution is probably to use a DynDNS service, which allows you to associate a domain name with your box.
There are many DynDNS services, and the settings differ a bit depending on the box, but the general principles remain the same.
This tutorial is already quite long enough, I refer you to our tutorial dedicated to putting a Raspberry Pi online with a DynDNS, which you will just have to adapt a little bit!
All you have to do is model and print!


