How to create a private Git server with the Raspberry Pi and GitLab
ⓘ Cet article peut avoir été partiellement ou totalement traduit à l'aide d'outils automatiques. Nous nous excusons des erreurs que cela pourrait engendrer.
If you do some software development you most likely know GitHub, which is probably the most known web Git repository manager.
For those of you who would not know GitHub yet (just, stop doing management, do a real job, start coding) here is a reminder.
GitHub is a web service based on the software Git (which is a versioning software written by Linus Torvald) and which allows to host a project while providing many tools like the management of tickets (through the “Issues”), the compilation of statistics or the creation of a Wiki for a project.
So, today we will see how to create your own Git repository management server, with GitLab, an open souce GitHub-like, and the Raspberry Pi!
Why create your own Git server on your Raspberry Pi?
Even if it’s a pretty amazing system (GitHub is still the largest code-sharing system in the world), GitHub has some flaws that could cause you to want to host your private Git repository management system on your Raspberry Pi.
Among these flaws, there is the fact that GitHub, in its free version, obliges you to leave your code accessible to all readers. Another fault, GitHub itself is not open source and that’s not cool!
Finally, using GitHub is to trust a third party for the hosting of your data, with what this induces as dependence and as lack of configurability.
For all those reasons, a lot of startups, groups of software programmers and other IT professionals (and in particular students) want to host their own Git server.
It turns out that the cheapest and easiest way to host a private Git server is to do it with a Raspberry Pi.
Indeed, to create your Git management system at home, you will only need the three following equipments :
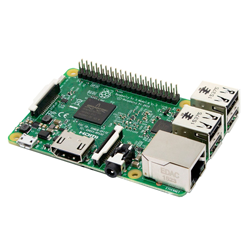
- A Raspberry Pi 3 (that you can easily found here on Amazon)
- A power supply powerful enough (take a look at this one at the same seller)
- And finally, a 32 GB MicroSD card (again, for few dollars on Amazon), which is largely enough for a Git server
And with those simple few things and this tutorial, you will be able to easily create your own private Git repository.
Why using GitLab and the Raspberry Pi to create your GitHub-like at home?
If there are other online services that come to compete with GitHub (including BitBucket) we are looking for an alternative that offers us both, the main features of GitHub, and the possibility of self-hosting.
As seen previously, we choose the Raspberry Pi for his tiny price and his Linux support, which is definitely the best operating system for creating a Git server.
On the software part, we choose GitLabl because he is free, thinked specifically for self-hosting, and that he provide almost all GitHub features, like a very clear web interface for Git repository management, issuing system, Wiki, and others…
Big plus for GitLab, it offers an installer for Raspbian and the new Raspberry Pi 3!
How to install GitLab on the Raspberry Pi
Installing GitLab on the Raspberry Pi is very simple. Here we will perform an installation for Raspbian.
At first we will install all the software that can be useful to GitLab or its installation. To do this, run the following command:
sudo apt install curl openssh-server ca-certificates postfix apt-transport-https
This command will (amoung other things) install the “postfix” software. When installing it, be sure to choose the “Website” option.
Once installed, we will now add the GitLab repository to Raspbian in order to manage software updates more easily.
For that, we will start by adding the keys of the deposit then we will add the deposit as such. To do this, run the following commands:
curl https://packages.gitlab.com/gpg.key | sudo apt-key add -
sudo curl -o /etc/apt/sources.list.d/gitlab_ce.list "https://packages.gitlab.com/install/repositories/gitlab/raspberry-pi2/config_file.list?os=debian&dist=jessie" && sudo apt-get update
Once done, we will be able to install GitLab (Community Edition) and configure it. To do this, run the following command:
sudo apt-get install gitlab-ce
sudo gitlab-ctl reconfigure
All you have to do is connect to the address of your Raspberry Pi from your browser and complete the configuration. By default the login is “root” and the password “5iveL! Fe”.
If you want to make your GitLab reachable from external networks, you need to make your Raspberry Pi available through internet with DynDNS, we let you search for that on Google (or bing if you are this kind of person).
Conclusion
So, you now know how to create your own Git server at home with the Raspberry Pi and GitLab.
To continue in self-hosting, take a look at our article dedicated about the creation of a NAS with your pi or our tutorial about how to create your own media server with the Raspberry Pi and OSMC!


“Note that GitLab requires a 64-bit architecture and therefore the Raspberry Pi 3.”
I don’t see the point here since gitlab also works on Pi2 and the OS Raspberian is still 32bits..
Okay, i don’t remember where this info come from, so i remove it, thanks for your return !