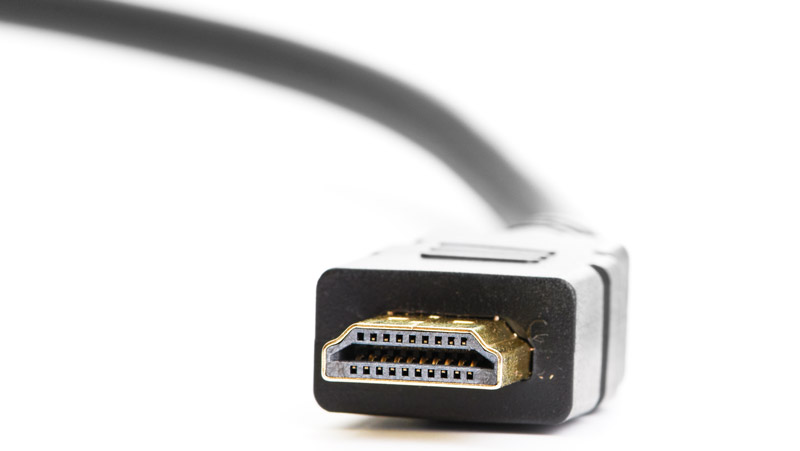
Raspberry Pi HDMI display not working, how to solve it?
ⓘ Cet article peut avoir été partiellement ou totalement traduit à l'aide d'outils automatiques. Nous nous excusons des erreurs que cela pourrait engendrer.
Beyond the articles and related comments, we receive in the mailbox of Raspbian France many questions and requests for help!
Among all these questions / requests for help around the Raspberry Pi, there is one that come back very often, “My Raspberry Pi HDMI display not working, how to fix it ?”.
Today we offer you a short tutorial, but that will probably allow many readers to find their happiness, how to force the Raspberry Pi to display on the HDMI port!
The video outputs of the Raspberry Pi
The Raspberry Pi has a very large connectivity that is partly at the origin of its success!
Among its outputs, the Raspberry Pi has 3 outputs allowing the display of a video stream.
- HDMI, of course, which will be the subject of this tutorial and you will be using in most cases. Note that if you need to connect your Raspberry Pi to a VGA display, you will also use the HDMI port, but you will need to go through an HDMI to VGA converter. In this cas, take a look at this one here on Amazon.
- The audio / video jack output, this is a 4-pole jack output, which you will be useful especially for the connection on small screens like thoses for cars, like this one.
- The GPIO/SPI ports, that are use in particular by the touchscreens, like the official one from the foundation (you can found it here at Amazon).
All these connections are very useful, especially because they allow the Raspberry Pi to respond to most of the use cases you may encounter.
The only problem with all these connections is that the Raspberry Pi sometimes has a little trouble finding the video output to use is common to see people who are having trouble to display image on the Raspberry Pi through HDMI.
Force Raspberry Pi display through HDMI
Among all the problems submitted to us, the most common is undoubtedly problems to display through HDMI with the Raspberry Pi!
As often in computing, if the problem is particularly blocking and the solution is not always easy to find, it is by contrast the simplest to apply.
Indeed, there are two possible solutions, either the Raspberry Pi is poorly configured or its power supply is insufficient.
Misconfigured display output on the Raspberry Pi
This is probably the most common case that can lead to a no display when connecting the Raspberry Pi to HDMI situation.
To solve the problem, simply connect to your Raspberry Pi via SSH and modify with your favorite text editor (here we will use nano) the file /boot/config.txt.
Note that you will need administrator rights and therefore sudo command (with nano this will give for example sudo nano /boot/config.txt).
You should then find within this file the following two lines (if not, add them at the end):
#hdmi_force_hotplug=1
#hdmi_drive=2
To solve the problem you just have to uncomment (ie remove the sign # at the beginning) these lines and save the file (Ctrl + o, Enter, Ctrl + x with nano). Restart your Raspberry Pi and you’re done!
Just for information, here is what these two lines do:
hdmi_force_hotplug=1: Forces to display through HDMI event if no HDMI screen is detected. Remember to re-comment this line if you need to display the Raspberry Pi on a different port than the HDMI.hdmi_drive=2: Trying to use HDMI mode rather than DVI mode, this allows you to solve certain sound problems.
hdmi_safe, maximum compatibility!
If the previous manipulation has not been successful, you can try to repeat the operation but this time also uncommenting the line hdmi_safe=1 (in this case, comment again the other lines).
This line will ask the Raspberry Pi to attempt a connection with a maximum HDMI compatibility mode. It is a technique that lacks a little finesse and that risks giving a display to the average quality, but that could well be useful to you one day!
According to the documentation, this line is equivalent to setting up the following settings:
hdmi_force_hotplug=1, hdmi_ignore_edid=0xa5000080, config_hdmi_boost=4, hdmi_group=2, hdmi_mode=4, disable_overscan=0, overscan_left=24, overscan_right=24, overscan_top=24 et overscan_bottom=24
A solution to use only if the previous ones do not work!
Insufficient power supply
If despite all your attempts the Raspberry Pi still not display anithing on HDMI, it can come from a simple power supply problem.
In other words, the power delivered by your power supply is enough to run your Raspberry Pi, but not to power the HDMI connection.
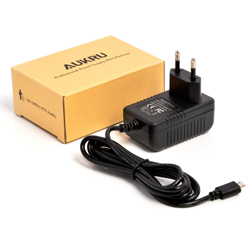
In this case, one only solution, take a sufficiently powerful diet. We advise you to use this power supply that’s power enough, which you can found here on Amazon.
Conclusion
We hope that this tutorial will help you to fix your Raspberry Pi HDMI display!
Now that your HDMI output works perfectly, you just have to learn how to install a super media-center on your Raspberry Pi!
Feel free to let us know your questions by comment and share the article around you when people encounter this problem!





[pi4]
# Enable DRM VC4 V3D driver on top of the dispmanx display stack
#dtoverlay=vc4-fkms-v3d
#max_framebuffers=2
These are at the end of the config.txt file. They were added with the newest system update and totally wrecked the video display. It took me going thru the file line by line to uncomment then recomment till I got here and commented them out. With these lines uncommented I could get a safe mode display or nothing. I don’t know if I will ever need the v3d overlay but I didn’t need it before, now life is better without it.
Hello, I’ve followed your tutorial about using ssh to remote control my raspberry pi, but how do I connect to my Raspberry pi4 with SSH even if I don’t have any monitor to set up?
I’ve modified the config.txt file directory in sd card but it doesn’t work at all… is it possible that raspberry doesn’t support my TV?
Hello, you must enable SSH by creating a file named
sshon the boot partition of the sd card.I am having the same issue with my Rasberry Pi4. I am a total newbie and can’t get the thing to display to a monitor or laptop. The SSH thing assumes that you can access it to even allow it. Can you direct me to a tutorial to enable SSH from the SD card?
Of course, you can find such a tutorial here : https://howtoraspberrypi.com/ssh-raspberry-pi-remote-control/
You need to explain everything when you say do this: for examplee connect withh ssh to your raspberry pi. How do you do that. Do not assume people are familiar with the process. Thank You
Sorry, we add a link to our tutorial about SSH. But you have to keep in mind we have wrote so many articles, sometimes we forgot link, we do typos, we forget people didn’t know something we take for granted, etc. Nobody’s perfect ! We always try to explain and keep balance between easyness and explanations.
First time Pi user.
Impossible to edit anything if the damn thing won’t even display anything.
How am I supposed to do anything about this if I can’t even start the installation since there is no singal to the connected screen.
Googling this just tells the same thing all over again about editing the config file.
But since the OS even can’t be installed there is nothing to edit.
I mean the device is undoing its own fixing itself.
As say in the article, you can simply editing it by SSH. Or even directly by mounting the SD card on your computer and modify file.