How to do a Raspberry Pi headless setup
ⓘ Cet article peut avoir été partiellement ou totalement traduit à l'aide d'outils automatiques. Nous nous excusons des erreurs que cela pourrait engendrer.
In many cases, the solution we want to install on our Raspberry Pi does not require physical access to the Pi, such as an web server, or a Minecraft server. It may happen that we do not have any screen, keyboard, or mouse to control the Raspberry. So you’re going to be thrilled to know that to create a Raspbian system, we do not need any screen or keyboard, and your computer can do the job.
Indeed there is a solution to configure Raspbian on the Raspberry Pi headless, so it can start and connect in Wi-Fi to your Internet network. This method mean you will not use any screen or keyboard to install and configure Raspbian.
Elements required to set up your Pi
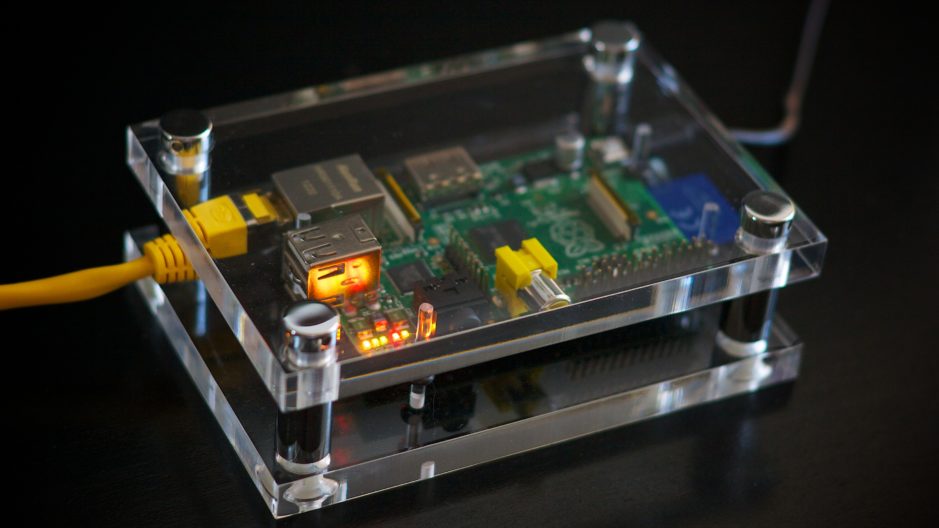
In order to make a Raspbian installation on the Raspberry Pi, you will need all the essential elements, a Raspberry Pi 3b , its power supply , and a MicroSD card (8GB is sufficient).
You will also need to download the latest version of Raspbian, which can be downloaded here . We recommend the Lite version because we do not need the GUI. No need to take a coffee break, Raspbian Lite is relatively lightweight and downloads pretty fast. Once the image is downloaded and decompressed, you will have to install it on the SD card, for that we made a detailed article ( here for Windows and there for Linux / Mac ).
Configure the MicroSD card
Now that Raspbian is installed on the SD card, we will be able to configure and modify some files so that the Raspberry Pi can run headless. To do this, we will start by activating SSH on the Raspberry Pi. Remember, the rest of the tutorial is on your PC and not on the Raspberry Pi.
Enable SSH connection
Indeed since the attack that targeted the connected objects in November 2016, the Foundation Raspberry Pi decided to not activate the SSH connections by default. But in order not to block people opting for an installation headless, without screen and without keyboard therefore, the Foundation has put in place a simple and fast solution to activate the SSH. You simply have to create a file named ssh in the boot partition (the file does not expect any extension).
When the Pi is first started, it checks if the file exists and activates the SSH accordingly.
Connect the Raspberry Pi to your Wi-Fi router
The SSH connection is now possible but there is still a step to make the Raspberry usable remotely, headless. Of course, I’m talking about making the connection to the router, which is paramount to using the Pi with SSH.
First, if you want to connect the Raspberry Pi via Ethernet, you can go directly to the next section because no configuration is required.
Here we need a Raspberry Pi 3b or a Raspberry Pi Zero W but the solution remains the same with other models (Pi 1B, 2B, Zero), except that you must add a USB Wi-Fi adpater.
In order to configure the Wi-Fi connection when starting the Pi, we will create the wpa_supplicant.conf file in the boot partition.
The file must contains the following lines:
country=fr
update_config=1
ctrl_interface=/var/run/wpa_supplicant

network={
 scan_ssid=1
 ssid="RouterName"
 psk="Security"
}
In the ssid line , you will replace RouterName with the name of your box, for example , Livebox-5678. For the psk field , this corresponds to the security code of your box, so replace Security by the key of your box.
If you want to know more about the Wi-Fi connection, we have an article about it that you can find by following this link .
Set up a static ip for your Raspberry Pi
In order to know the ip that the Raspberry Pi will take, we will give it a static ip. For this we will modify the file dhcpd.conf located in the /etc/folder.
To modify the file, use the same software as to configure the Wi-Fi.
Once in the file, go to the last line and add the following content
eth0
static ip_address = 192.168.1.100 / 24
static routers = 192.168.1.1
static domain_name_servers = 192.168.1.1

wlan0 interface
static ip_address = 192.168.1.100 / 24
static routers = 192.168.1.1
static domain_name_servers = 192.168.1.1
Let’s take a look at all this, here interface eth0 corresponds to a connection of wired type and interface wlan0 to a Wi-fi connection . So you have to choose the one that corresponds to your setup.
Static ip_address is used to indicate the ip that your Raspberry Pi will have once started. Generally the ip is of type 192.168.1.x , replace the x with the value of your choice, be careful not to conflict with other devices .
For static router and static domain_name_servers , this is usually the ip of your router, which is 192.168.1.1 .
You only have to save the file.
The SD card is now ready to be inserted into the Raspberry Pi and to start it without a screen and without a keyboard . All you have to do is login SSH to finalize the configuration of the Raspberry Pi (change of passwords, extend the SD card, etc).


i’m a NewB with the Pi Zero W and Raspbian… I started out with a monitor, keyboard and mouse, created a Python script and would like to run it headless… can the full version of Raspbian be configured to run headless or must I create a new SD card with Lite?
I would really like to be able to *easily* switch between a development mode (monitor, keyboard, and mouse) and a user mode (headless).
Is this possible?
Thank you,
Chuck
A full raspbian can perfectly work headless, you can use
raspi-configto disable desktop.The wpa_supplicant.conf file in the example seems to be missing the security type referenced above it.
Hello, apparently this line seems to be unecessary, so i removed it but forgot to do the same on tutorial text. I fixed it.